8 inch cake cutting guide
Cutting an 8-inch cake precisely ensures everyone receives an equal portion, enhancing any celebration! Utilizing 4×6 guides simplifies serving sizes.
Proper technique avoids crumbling and messy frosting, presenting a beautiful dessert.
Why Proper Cake Cutting Matters
Precise cake cutting isn’t merely about aesthetics; it’s about hospitality and ensuring each guest feels valued. Consistent slice sizes prevent disputes and demonstrate thoughtfulness, especially at events like weddings or birthdays.
Using guides, like the 4×6 cards available, guarantees proportionate servings, maximizing enjoyment for everyone. Sloppy cuts can lead to uneven portions, crumbling, and a less-than-ideal presentation.
Furthermore, proper technique preserves the cake’s structural integrity, preventing it from falling apart during serving; A well-cut cake elevates the entire dessert experience!
Understanding 8-Inch Cake Dimensions
An 8-inch cake refers to its diameter, not necessarily its height. Standard cakes are approximately 4 inches tall, influencing slice size and cutting strategies. Visualizing the cake as a circle is crucial for accurate division.
Understanding these dimensions helps determine the number of servings. A typical 8-inch cake can yield 8-12 portions, depending on desired slice size. Measuring two inches from the edge, as a guide, provides a starting point for consistent cuts.
Considering height alongside diameter ensures balanced portions and a visually appealing presentation.
Tools You’ll Need for Precise Cutting
Essential tools include a sharp knife (serrated or straight), cake cutting guides, and measuring tools like rulers or spoons for accurate portioning.
Cake Cutting Guides & Templates
Cake cutting guides, often 4×6 cards, are invaluable for achieving consistent slice sizes, especially for round cakes. These templates provide visual cues for marking portions, ensuring proportionate servings for every guest.
They simplify the process, eliminating guesswork and reducing waste. Printable guides are readily available online, or you can create DIY versions. Using a grid chart or template guarantees even distribution, particularly beneficial for wedding cakes or large gatherings where presentation matters.
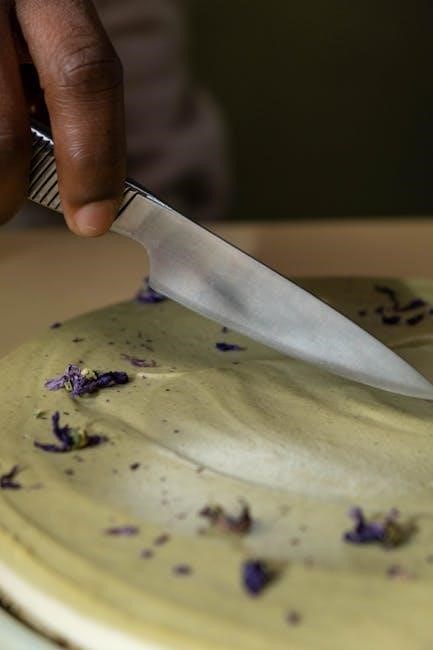
Sharp Knives: Serrated vs. Straight Edge
Choosing the right knife is crucial for a clean cut. Serrated knives excel at slicing through delicate cakes and those with frosting, minimizing crumbling due to their saw-like motion. However, a straight-edge knife, exceptionally sharp, can also work well, particularly for firmer cakes.
Ensure the blade is long enough to traverse the cake in one smooth motion. A dull knife will compress the cake, resulting in ragged edges. Regularly honing or sharpening your knives maintains optimal performance for precise cake cutting.
Measuring Tools: Rulers & Spoons
Accurate measurements are key to even slices. A ruler helps determine precise portion sizes, especially when aiming for specific serving counts. Measuring two inches from the cake’s edge, as a guide, is a common starting point for initial cuts.
Surprisingly, the handle of a wooden spoon can serve as a makeshift measuring tool! It’s useful for creating guide holes for soaking liquids. While not essential, these tools enhance precision and consistency when dividing an 8-inch cake.
Basic Cutting Techniques for an 8-Inch Round Cake
Mastering basic techniques, like the center-point method, ensures even slices. Start by finding the cake’s center and cutting from there for consistent portions.
The Center Point Method
The center point method is a foundational technique for cutting round cakes evenly. Begin by gently locating the precise center of the 8-inch cake. Visualize or lightly mark this point.
Next, using a long, sharp knife, cut directly through the center, creating the first division. Continue cutting from the center outwards, creating subsequent slices like segments of a pie.
This method guarantees that each slice originates from the central point, resulting in consistently sized portions. It’s especially useful when precise serving counts are needed, and is a great starting point for beginners.
Measuring from the Edge (2-Inch Guide)
Measuring two inches from the cake’s edge provides a reliable guide for consistent slice sizes. This technique is particularly helpful for achieving uniform portions without relying on precise centering.
Using your thumb or a ruler, measure approximately two inches inward from the outer rim of the 8-inch cake. Visualize a circular path following this measurement around the entire cake.
Cut along this imagined line, creating an inner circle. Then, cut from this inner circle outwards to the edge, forming slices. This method works well for standard 4-inch tall cakes.
Using a Rotating Cake Stand
Employing a rotating cake stand significantly simplifies the cutting process, offering greater control and precision. This tool allows you to maintain a steady hand while rotating the cake, rather than maneuvering the knife around a stationary cake.
Secure the 8-inch cake firmly onto the rotating stand. Position yourself comfortably and begin cutting, gently rotating the stand after each slice.
This method ensures clean, even cuts and minimizes the risk of smearing frosting. It’s especially beneficial when using the 2-inch guide technique for consistent portions.
Cutting for Specific Number of Servings
Achieving desired servings from an 8-inch cake requires precise cuts; guides help determine slice angles for 8, 10, or 12 portions.
Cutting for 8 Servings
For eight even servings from an 8-inch round cake, begin by finding the center. Visualize or lightly mark a cross through the cake’s middle. Then, cut the cake into quarters, creating four equal wedges.
Next, bisect each quarter, resulting in eight identical slices. A two-inch measurement from the edge can assist in visualizing slice size.
Using a guide or template ensures consistent portions. Remember to use a long, serrated knife for clean cuts, minimizing crumbs and maintaining frosting integrity.
Cutting for 10 Servings
Achieving ten equal servings from an 8-inch cake requires a slightly more refined approach. Start by locating the cake’s center and cutting it into five equal wedges, resembling pie slices.
Then, carefully bisect each of those five wedges, creating ten proportionate portions. Visualizing a grid or utilizing a cake cutting template can greatly improve accuracy.
Maintain a steady hand and a sharp knife to prevent crumbling. Consistent slice width is key for a visually appealing and fair dessert presentation.
Cutting for 12 Servings
For twelve servings from an 8-inch cake, precision is paramount. Begin by finding the center and dividing the cake into six equal wedges, similar to slicing a pie.
Next, carefully bisect each of those six wedges, resulting in twelve evenly sized portions. Employing a rotating cake stand aids in maintaining consistent angles and slice dimensions.
A two-inch measurement from the edge can assist in visualizing slice size. Remember, a sharp knife and gentle pressure are crucial for clean cuts and a beautiful presentation.
Advanced Cutting Patterns
Explore grid methods for uniform slices or experiment with wedge variations for visual appeal. These techniques elevate cake presentation for special events!
The Grid Method for Even Slices
The grid method guarantees perfectly even cake slices, ideal for larger gatherings or when precise portioning is desired. Begin by carefully cutting the 8-inch cake into vertical slices, creating a grid pattern.
Visualize lines intersecting at the center, dividing the cake into equal sections. A helpful technique involves initially marking the circumference with a knife, then making subsequent cuts.
This approach minimizes crumbling and ensures consistent serving sizes, especially beneficial for tiered or decorated cakes where presentation matters. Using cake cutting guides can further enhance accuracy!
Wedge Cutting Variations
Wedge cutting, while traditional, offers variations for aesthetic appeal and serving needs. Beyond standard slices, consider slightly overlapping cuts for a fuller, more generous portion. Adjusting the angle creates narrower or wider wedges, catering to different preferences.
For a visually striking presentation, alternate wedge sizes – a larger slice followed by a smaller one. This technique adds dynamic interest to the cake’s appearance. Remember to maintain a consistent starting point (the center) for uniform results.
Experiment with decorative frosting swirls along the cut edges to elevate the presentation!
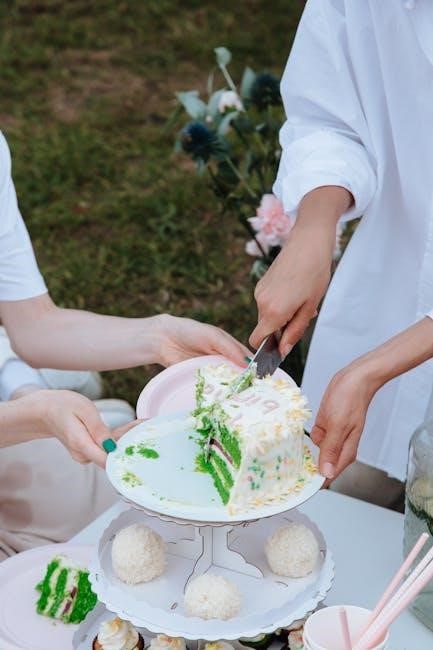
Cutting for Wedding Cake Portions
Wedding cake portions demand precision, often smaller than standard servings due to multiple tiers and desserts. Aim for “petite” wedges, approximately 1.5 x 2 inches at the outer edge, ensuring guests can enjoy a taste of each flavor.
Prioritize neatness; wedding cakes are focal points! Utilize a long, thin knife and gentle sawing motions. Consider pre-cutting slices backstage for a seamless service.
Communicate with the venue regarding guest count and desired portion sizes for optimal planning and a flawless presentation.
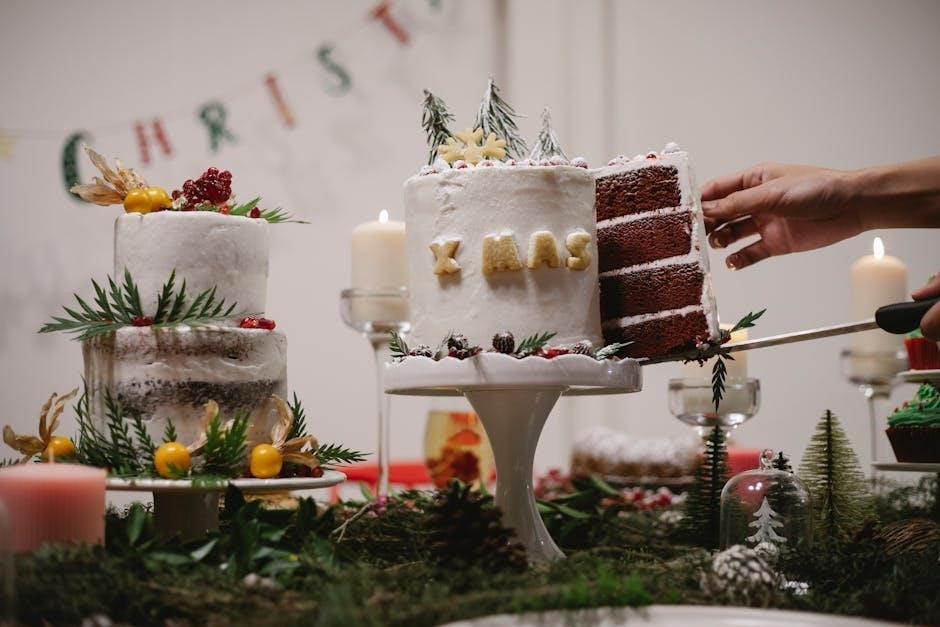
Dealing with Different Cake Types
Cake type impacts cutting; delicate cakes need a gentler touch, while frosted cakes require clean, swift cuts to prevent smearing and crumbling.
Cutting Cakes with Frosting
Cutting cakes adorned with frosting demands a sharp, thin-bladed knife for clean slices. Warm the blade slightly under hot water, then dry it thoroughly before each cut; this minimizes frosting drag and ensures neat portions.
Wipe the knife clean after every slice to maintain precision and prevent frosting buildup. A gentle sawing motion, rather than pressing down, is ideal for avoiding smearing. Consider chilling the cake briefly before cutting to firm up the frosting, making it easier to manage and yielding more defined slices.
Cutting Cakes with Fillings
Cakes featuring fillings, like fruit or cream, require a delicate approach to prevent displacement. Employ a long, serrated knife and use a gentle sawing motion, avoiding downward pressure that could squeeze out the filling.
Chilling the cake for approximately 30 minutes before cutting helps stabilize the filling and maintain its integrity. Wipe the knife clean after each slice to ensure neat cuts and prevent mixing of flavors. Consider the filling’s consistency; softer fillings necessitate extra care and slower, more controlled movements.
Cutting Delicate Cakes (Chiffon, Angel Food)
Chiffon and angel food cakes, known for their airy texture, demand an exceptionally gentle cutting technique. Utilize a long, serrated knife and a slow, lifting motion rather than pressing down. Avoid sawing, as this can compress the delicate crumb.
A thin, flexible knife works best. Support the cake while cutting to prevent breakage. These cakes are best served immediately after cutting to maintain their texture. Chilling isn’t recommended, as it can make them even more fragile.
Serving Size Considerations
A standard cake serving is roughly 1/8 of an 8-inch cake. Adjust slice sizes based on the event and guest appetites for optimal enjoyment!
Standard Cake Serving Size
Determining a standard cake serving often revolves around a 1/8 slice of an 8-inch round cake. This generally equates to approximately a 2-inch wide wedge, measured from the cake’s center to the outer edge.
However, factors like cake density and richness influence perceived portion size. A denser cake might satisfy with a slightly smaller slice, while a lighter, airy cake could warrant a larger portion.
Considering a typical serving of around 1.5 to 2 ounces is a helpful guideline when planning your cake cutting strategy.
Adjusting Serving Sizes Based on Event
Event type significantly impacts appropriate cake serving sizes. For casual gatherings or everyday desserts, larger, more generous slices are perfectly acceptable, prioritizing enjoyment.
However, formal events like weddings or sophisticated parties often call for smaller, more refined portions, allowing guests to sample various desserts without overindulging.
Consider the overall menu; if a buffet offers numerous options, smaller cake slices ensure guests save room for everything. Adjusting to the occasion enhances the experience!
Cake Portion Control Tips
Consistent slice size is key for fair distribution. Utilize cake cutting guides or templates to maintain uniformity, ensuring each guest receives an equal portion.
Pre-cutting slices before serving can streamline the process and prevent overindulgence. Consider using smaller dessert plates to visually reinforce portion control.
Offer a variety of desserts alongside the cake, encouraging guests to sample different treats in moderation. Thoughtful presentation also influences perceived portion size!

Troubleshooting Common Cutting Issues
Cracking or crumbling? Chill the cake first! Uneven slices? Measure carefully. Smearing frosting? Warm the knife before each cut for cleaner results.
Cracked or Crumbling Cake
Dealing with a delicate cake structure requires a gentle approach. If your 8-inch cake is prone to cracking or crumbling during cutting, chilling it thoroughly beforehand is crucial – about 30 minutes in the refrigerator firms up the layers.
Employ a long, serrated knife and use a sawing motion rather than pressing down, minimizing pressure. Warming the blade slightly can also help. Consider using cake cutting guides to ensure clean, even slices, reducing stress on the cake’s structure.
Slow, deliberate movements are key to preserving the cake’s integrity and presentation.
Uneven Slice Sizes
Achieving uniform cake slices is essential for a polished presentation and fair servings. If your slices vary in size, utilizing a cake cutting guide or template is highly recommended. These tools provide visual markers for consistent cuts.
Measure from the center or edge, consistently applying a 2-inch guide as a starting point. A rotating cake stand aids in precise, equal divisions. Practice makes perfect; take your time and focus on maintaining a steady hand throughout the cutting process.
Regularly assess slice sizes as you cut.
Frosting Smearing During Cutting
Frosting smearing is a common issue, but easily addressed with the right techniques. Warm knives exacerbate the problem; chilling your knife in the freezer for 15-20 minutes before cutting significantly improves results.
Use a gentle sawing motion rather than pressing straight down, minimizing friction. Wipe the blade clean after each slice to prevent frosting buildup. A serrated knife generally performs better than a straight-edged one, creating cleaner cuts.
Consider a hot knife for exceptionally smooth results.
Cake Cutting Guide Cards & Resources
Cake cutting guides offer a simple solution for even slices, especially for beginners! Printable templates and 4×6 cards are readily available online.
Benefits of Using Cake Cutting Guides
Utilizing cake cutting guides dramatically improves presentation and portion control, ensuring each guest receives a fair serving of your delicious creation. These guides, often 4×6 in size, eliminate guesswork and provide clear visual cues for precise cuts.
They are particularly helpful for round cakes, where achieving equal slices can be challenging. Guides minimize crumbling, reduce frosting smearing, and simplify the process for both experienced bakers and novices.
Ultimately, a guide contributes to a more polished and enjoyable dessert experience for everyone involved, making celebrations smoother and more satisfying!
Where to Find Printable Guides
Numerous online resources offer free, printable cake cutting guides specifically designed for 8-inch round cakes. A quick search will reveal options from baking blogs, culinary websites, and even printable template sites. Amazon also sells packs of 30, 4×6 care cards with detailed instructions.
Pinterest is a treasure trove of visual guides, while many baking supply stores offer physical guides for purchase. Simply download, print, and place the guide on your cake for effortless, accurate slicing.
DIY options are also available, allowing for customization!
DIY Cake Cutting Guide Options
Creating your own guide is surprisingly simple! Trace a circle onto parchment paper matching your 8-inch cake’s diameter. Then, carefully mark lines indicating desired slice sizes – 2-inch measurements from the edge work well for standard portions.
Alternatively, use a ruler and protractor to create precise wedge markings. Laminating the guide adds durability for repeated use.
For a quick fix, fashion a template from cardboard or even stiff plastic, ensuring accurate and consistent slices every time!
Cake Cutting for Different Occasions
Occasion dictates slice size! Birthday cakes often favor larger portions, while weddings require precise, smaller cuts for many guests.
Adjust your guide accordingly!
Birthday Cakes
For birthday celebrations, a generous approach to cake cutting is often appreciated! Aim for 8-12 servings from an 8-inch cake, allowing for larger portions to satisfy celebratory appetites.
Using a cake cutting guide, especially one designed for round cakes, ensures relatively even slices. Don’t stress perfection; a slightly rustic cut adds to the festive charm! Consider the number of guests and adjust slice sizes accordingly. A simple grid or wedge pattern works well, prioritizing ample servings for everyone to enjoy a delightful piece of birthday cake.
Wedding Cakes
Wedding cake cutting demands precision, as presentation is key! An 8-inch tier often serves around 16-24 guests, requiring meticulous slicing for elegant portions.
Employing a grid method is highly recommended for uniform, photograph-worthy slices. Utilize a cake cutting guide to maintain consistent width and shape. Consider the cake’s height; taller tiers necessitate smaller slices. Coordinate with the venue or caterer to ensure smooth serving. Prioritize clean cuts to showcase the cake’s intricate details and frosting work, creating a memorable experience.
Everyday Dessert Cakes
For casual enjoyment, an 8-inch cake offers flexibility in cutting styles. A simple radial approach, dividing into 8 or 10 slices, works well for family desserts.
Measuring two inches from the edge provides a good starting point for portioning. Don’t stress over absolute perfection; a slightly rustic cut is perfectly acceptable! Using the back of a spoon can help guide your knife. Focus on serving sizes appropriate for individual appetites. Enjoy the cake without the pressure of formal presentation!
Storing Leftover Cake
Proper storage maintains freshness after cutting! Use airtight containers, and refrigerate slices to prevent drying. Reheat gently for optimal flavor.
Proper Storage Containers
Selecting the right container is crucial for preserving leftover cake’s moisture and flavor. Airtight containers are paramount; plastic containers with tight-fitting lids or reusable storage bags work exceptionally well. For cut slices, individually wrapping them in plastic wrap before placing them in a container prevents sticking and drying.
Glass containers are also a fantastic option, offering a non-porous surface that won’t absorb odors. Avoid using paper plates or flimsy containers, as they won’t provide adequate protection. Remember, the goal is to minimize air exposure!
Maintaining Cake Freshness
To keep your cake delightful, proper storage is key. Once sealed in an airtight container, store at room temperature for up to three days. For longer preservation – beyond that timeframe – refrigeration is recommended, though it can slightly dry the cake.
If refrigerating, bring slices to room temperature before serving for optimal texture and flavor. Adding a slice of bread to the container helps retain moisture. Avoid freezing frosted cakes, as the frosting’s texture may change.
Reheating Cake Slices
Reheating cake slices gently restores their delightful texture and enhances flavors. For a subtle warmth, microwave individual slices for 10-15 seconds. Be cautious, as over-microwaving can lead to dryness.
Alternatively, for a more even reheat, briefly warm the slice in a preheated oven at 300°F (150°C) for 5-7 minutes. Covering the slice loosely with foil prevents excessive drying. Enjoy the revived moistness and deliciousness!
Beyond the Basics: Creative Cake Presentation
Elevate your cake service with thoughtful plating and garnishes! Arrange slices artfully, adding fresh fruit, chocolate shavings, or a dusting of powdered sugar.
Plating and Garnishing
Transform each cake slice into a miniature work of art through careful plating and garnishing techniques. Consider the cake’s flavor profile and the occasion when selecting accompaniments.
A simple swirl of whipped cream, a scattering of fresh berries, or a delicate chocolate curl can dramatically enhance visual appeal. Utilize contrasting colors and textures for maximum impact.
Dusting with powdered sugar adds an elegant touch, while a sprig of mint provides freshness. Don’t overcrowd the plate; allow the cake slice to remain the focal point.
Cake Slice Arrangement
Presenting cut cake slices thoughtfully elevates the dessert experience, especially for gatherings. Consider arranging slices in a circular pattern on a platter, mimicking the original cake form.
Alternating slice directions creates visual interest and facilitates easy access. For larger events, tiered displays maximize space and showcase the cake’s presentation.
Garnishing between slices with fruit or edible flowers adds color and sophistication; Ensure sufficient space between each slice to prevent smudging or damage during serving.
Adding Finishing Touches
Elevate each cake slice with simple, yet impactful finishing touches. A dusting of powdered sugar adds elegance, while a fresh berry or mint sprig provides color and aroma.
Consider a drizzle of chocolate sauce or a dollop of whipped cream for added indulgence. For themed events, incorporate edible decorations aligning with the occasion.
Small, thoughtful details transform a simple slice into a memorable treat. Ensure garnishes complement the cake’s flavor profile, enhancing the overall experience.